The Legend of Zelda: Tears of the Kingdom begins with an exciting journey on Great Sky Island. While the tutorial level is a great start, once you venture to the Surface, you’ll want to uncover the hidden map fog in Tears of the Kingdom. This guide will show you how to reveal the map fog in The Legend of Zelda: Tears of the Kingdom and explore the vast world with clarity.
How to Unlock Map in Zelda Tears of the Kingdom?
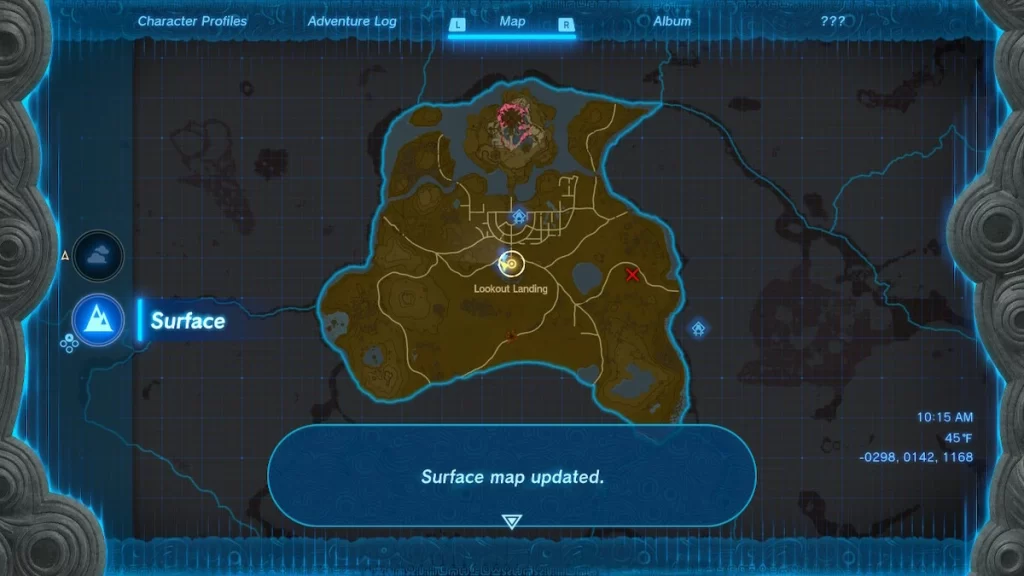
To unlock the map and dispel the fog, your progress through the “Crisis at Hyrule Castle” quest is crucial. While the distractions in Tears of the Kingdom might be tempting, it’s recommended to focus on the main quests until you complete the “Crisis at Hyrule Castle” quest. Finding Captain Hoz can be challenging, but the main quests provide a straightforward path. Once you finish the “Crisis at Hyrule Castle” quest, you’ll reveal the first section of the map.
How to Activate Skyview Towers in Zelda Tears of the Kingdom?
The only way to reveal the map fog in Tears of the Kingdom is by utilizing the Skyview Towers. Upon completing the “Crisis at Hyrule Castle” quest, your first Skyview Tower will automatically activate, uncovering both Surface and Sky Fog within a specific map tile.
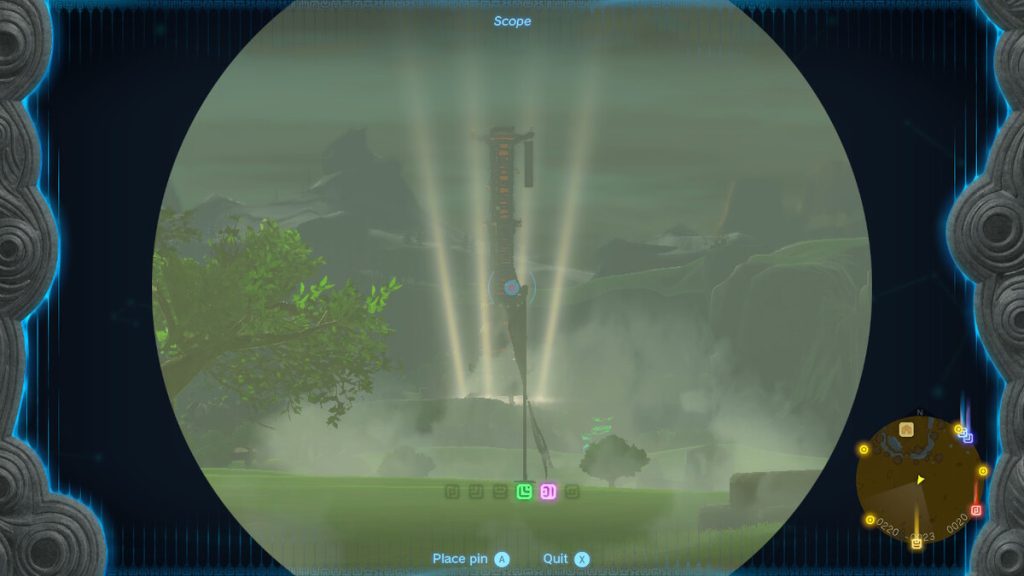
To activate the Skyview Towers scattered throughout Hyrule, follow these steps:
- Interact with the terminal inside the tower to activate the fast travel point, which will come in handy for future visits.
- Stand on the platform in the center of the tower and press the A button to activate it. This will launch Link into the sky, scanning the environment and updating the map. Changing the time of day beforehand can improve visibility but won’t affect the map itself.
- The elevated viewpoint from the Skyview Tower allows Link to glide rapidly toward points of interest. Additionally, revisiting the tower and launching Link into the air provides a vantage point for deploying the paraglider, helping you identify any missed points of interest during your initial exploration.
Reveal Entire Fog Map – All Skyview Towers
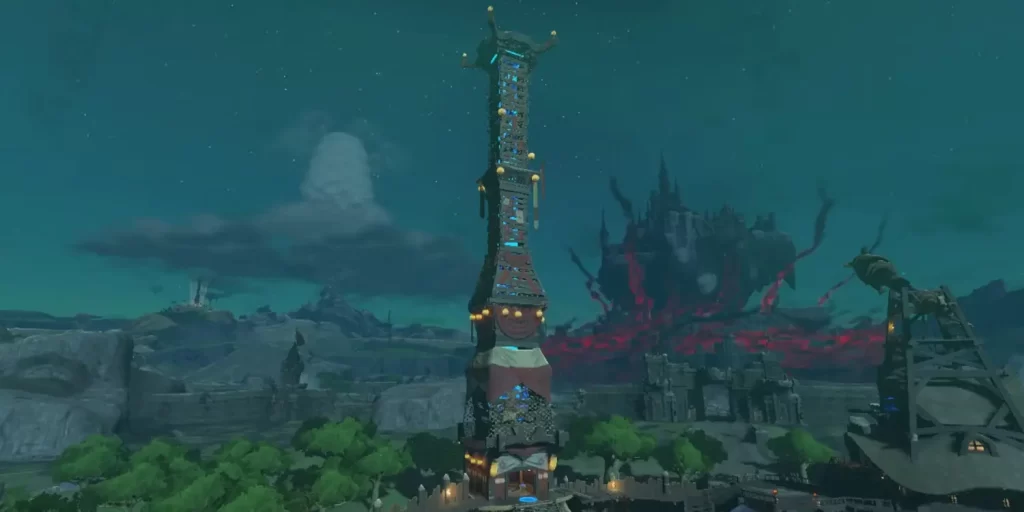
Once you’ve used the first Skyview Tower, more towers will become available across Hyrule. Look for their searchlights to locate them easily. Each Skyview Tower presents its own mini-puzzle to solve.
Here’s a list of the 15 Skyview Towers you must activate to reveal the entire map and eliminate the fog:
- Lookout Landing
- Lindor’s Brow
- Rospro Pass
- Pikida Stongrove
- Typhlo Ruins
- Eldin Canyon
- Ulri Mountain
- Upland Zorana
- Hyrule Field
- Sahasra Slope
- Popla Foothills
- Rabella Wetlands
- Mount Lanayru
- Gerudo Canyon
- Gerudo Highlands
With this guide, you’re equipped to reveal the map fog and unlock the secrets of Zelda Tears of the Kingdom. If you encounter any challenging Skyview Towers along the way, remember that Bullscore provides numerous guides to assist you throughout your gaming journey.
Read More Tears of the Kingdom Guide:
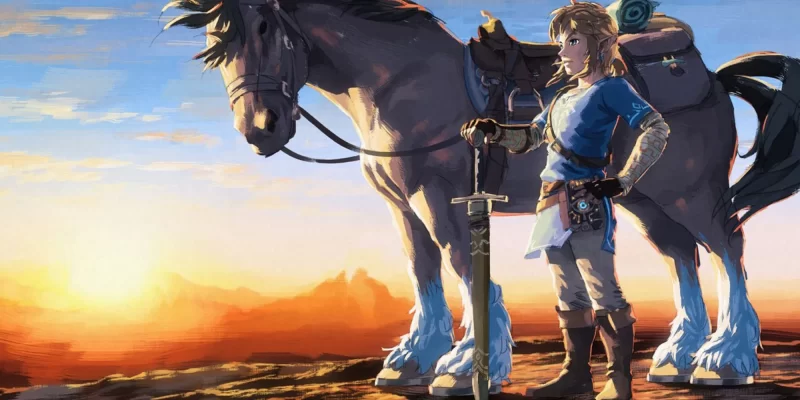
Zelda: Tears of the Kingdom is an expansive game that builds upon the systems introduced in Breath of the Wild. Among the new additions are the Tears of the Kingdom Towing Harness, a valuable tool for using your horse to transport various items and objects throughout Hyrule. In this guide, we will provide you with the steps to obtain and equip the Towing Harness, enabling you to engage in heavy lifting and efficient hauling.
However, you can tow any Harness without a horse. Therefore, if you are new to the Zelda Tears of the Kingdom or don’t have a horse in the game, you can get one through our guide to get a horse in Zelda Tears of the Kingdom.
How to Get Towing Harness for a Horse in Zelda: Tears Of The Kingdom?
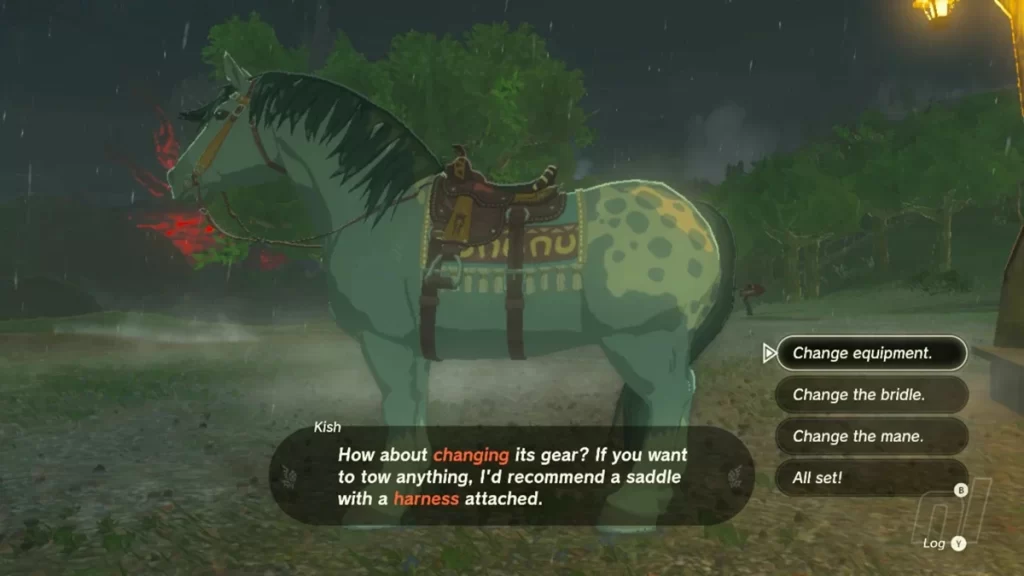
In order to acquire the Towing Harness in Zelda: Tears of the Kingdom, you will need to accumulate three Pony Points. Follow these steps to gather the required points:
- Visit Stables and Tame Horses: Begin by visiting two stables located in different areas of Hyrule. Once there, engage in horse taming by successfully bonding with a wild horse. Each visit to a stable and successful horse taming will reward you with one Pony Point.
- Accumulate Three Pony Points: Repeat the process of visiting stables and taming horses until you have accumulated three Pony Points. These points serve as currency for obtaining the Towing Harness.
- Claiming the Towing Harness: Once you have gathered the necessary three Pony Points, head to any Stable Hand and exchange them for the coveted Towing Harness. The Stable Hand will provide you with the Towing Harness, which will then be added to your inventory.
How to Equip the Towing Harness on Your Horse in Zelda: Tears Of The Kingdom?
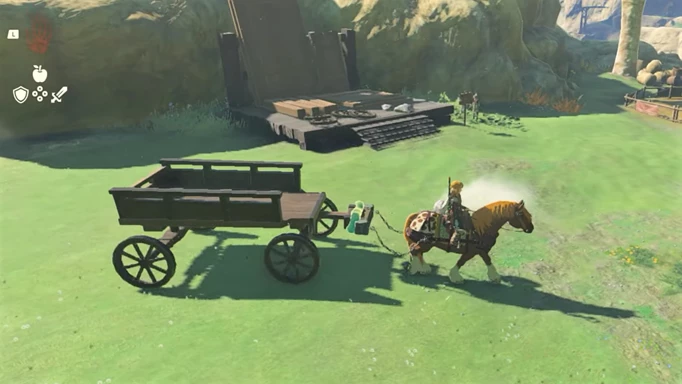
Once you have obtained the Towing Harness, follow these steps to equip it on your horse:
- Stabling Your Horse: Locate any stable within Hyrule and stable your horse there.
- Interaction with Stable Hand: Approach the Stable Hand situated outside the stable and initiate a conversation.
- Attaching the Towing Harness: Assuming you have the Towing Harness in your inventory, you will be presented with the dialogue option “Attach a harness.” Select this option, and the Towing Harness will be successfully attached to your horse.
- Utilizing the Ultrahand Ability: With the Towing Harness now equipped, you can utilize the Ultrahand ability to attach a wagon and transport various objects, including Koroks, constructs, and noteworthy items.
By following the steps outlined in this guide, you now possess the knowledge to get and equip the Towing Harness for your horse in Zelda: Tears Of The Kingdom. Enjoy the benefits of this useful tool as you explore and conquer the vast world of Hyrule. For more comprehensive guides and information on Zelda: Tears of the Kingdom, continue reading Bullscore Gaming Guide.
FAQs:
Q: How to get the Towing Harness in Zelda Tears Of The Kingdom?
Answer: To obtain the Towing Harness in Zelda Tears Of The Kingdom, you need to accumulate three Pony Points by visiting stables and taming horses. Exchange these points with any Stable Hand to receive the Towing Harness.
Q: How do I equip the Towing Harness on a horse in Zelda Tears Of The Kingdom?
Answer: To equip the Towing Harness on your horse in Zelda Tears Of The Kingdom, stable your horse at a stable and interact with the Stable Hand. Use the “Attach a harness” option to successfully equip the Towing Harness on your horse.
Q: Where can I find stables in Hyrule in Zelda Tears Of The Kingdom?
Answer: Stables can be found throughout Hyrule in Zelda Tears Of The Kingdom. Explore different regions and look for stable locations marked on your map. These stables serve as important hubs for various activities, including obtaining the Towing Harness.
Q: What are Pony Points in Zelda Tears Of The Kingdom?
Answer: Pony Points are a form of currency in Zelda Tears Of The Kingdom. You can accumulate Pony Points by visiting stables, renting beds for the night, and taming wild horses. These points are required to obtain the Towing Harness.
Q: Can I transport objects with my horse in Zelda Tears Of The Kingdom?
Answer: Yes, with the Towing Harness equipped on your horse in Zelda Tears Of The Kingdom, you can transport various objects such as wagons, Koroks, constructs, and other noteworthy items. Utilize the Ultrahand ability to attach and transport objects.
Q: What other abilities can be used with the Towing Harness in Zelda Tears Of The Kingdom?
Answer: The Towing Harness in Zelda Tears Of The Kingdom provides the Ultrahand ability, allowing you to attach and transport objects. This ability enhances your horse’s capabilities, enabling you to perform tasks like hauling and heavy lifting.
Q: How can I accumulate Pony Points in Zelda Tears Of The Kingdom?
Answer: You can accumulate Pony Points in Zelda Tears Of The Kingdom by visiting stables and taming horses. Each visit to a stable and successful horse-taming session rewards you with one Pony Point. Repeat this process until you have accumulated three Pony Points to obtain the Towing Harness.
Q: How can I attach a wagon using the Towing Harness in Zelda Tears Of The Kingdom?
Answer: Once you have the Towing Harness equipped on your horse in Zelda Tears Of The Kingdom, you can attach a wagon by utilizing the Ultrahand ability. Interact with the wagon while near your horse, and it will automatically attach, allowing you to transport items and objects.
Q: What are the benefits of the Towing Harness in Zelda Tears Of The Kingdom?
Answer: The Towing Harness in Zelda Tears Of The Kingdom offers several benefits. It enables you to transport objects like wagons, Koroks, constructs, and notable items. This functionality provides convenience and opens up new possibilities for exploration and completing various tasks in Hyrule.
Q: How do I interact with Stable Hands in Zelda Tears Of The Kingdom?
Answer: To interact with Stable Hands in Zelda Tears Of The Kingdom, approach them while at or near a stable. Engage in conversation by interacting with them, and they will provide you with dialogue options and information related to stabling horses, exchanging Pony Points, and obtaining the Towing Harness.
More Tears of the Kingdom Guides:

In Zelda Tears of the Kingdom, Link goes into a thrilling adventure filled with new abilities that add a fresh dimension to his quest. From unique combat techniques to innovative problem-solving skills, these powers offer players exciting ways to navigate through the game’s challenges. Let’s dive into the world of Zelda Tears of the Kingdom and explore the remarkable abilities at Link’s disposal.
New Abilities in Zelda Tears of the Kingdom
There are overall 6 new abilities in Zelda Tears of the Kingdom that players can explore as Link and utilize to progress in the game. Let’s look at all these abilities with their features and what powers they will give you in Zelda Tears of the Kindom journey:
Recall Ability in Zelda Tears of the Kindom:
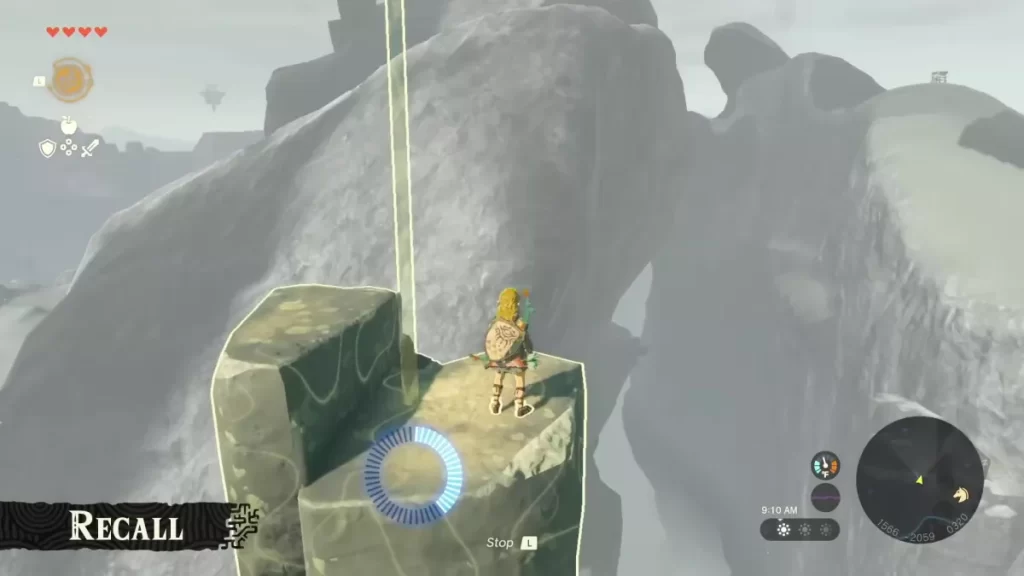
One of the first abilities Link learns is Recall, which allows him to manipulate time and reverse the motion of objects. With Recall, players can cleverly deflect enemy projectiles back at them or create pathways by reversing the flow of certain items. Unlock the Recall ability at the Temple of Time in the Great Sky Island tutorial section.
Fuse Ability in Zelda Tears of the Kindom:
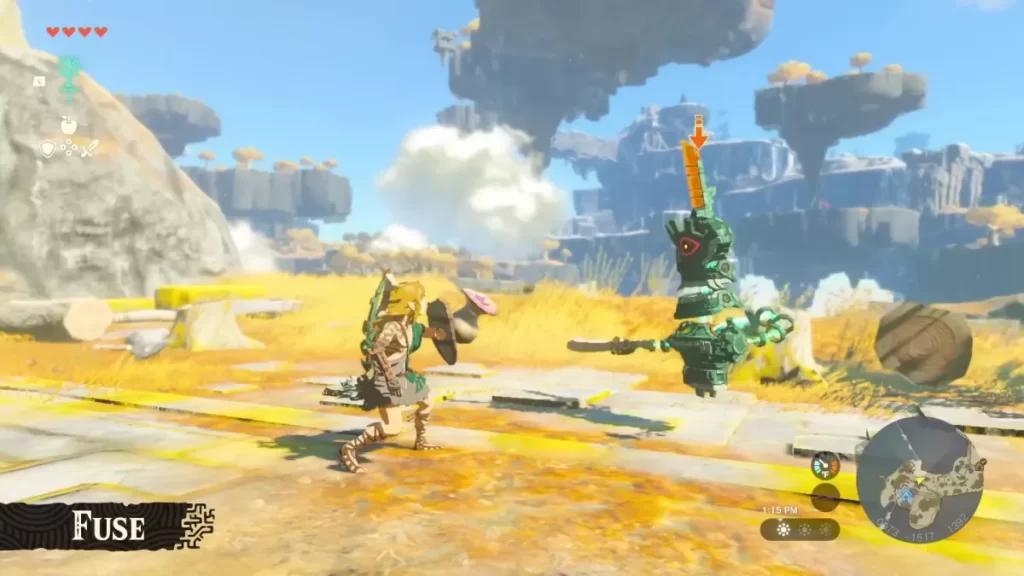
The Fuse ability, acquired at the In-Isa shrine, introduces a whole new level of versatility. By combining weapons, shields, and various items like monster parts, Link can create powerful hybrids with enhanced durability and unique effects. Experiment with different combinations to discover exciting possibilities for combat and exploration. Fuse adds depth and strategy to your adventures.
Ultrahand Ability in Zelda Tears of the Kindom:
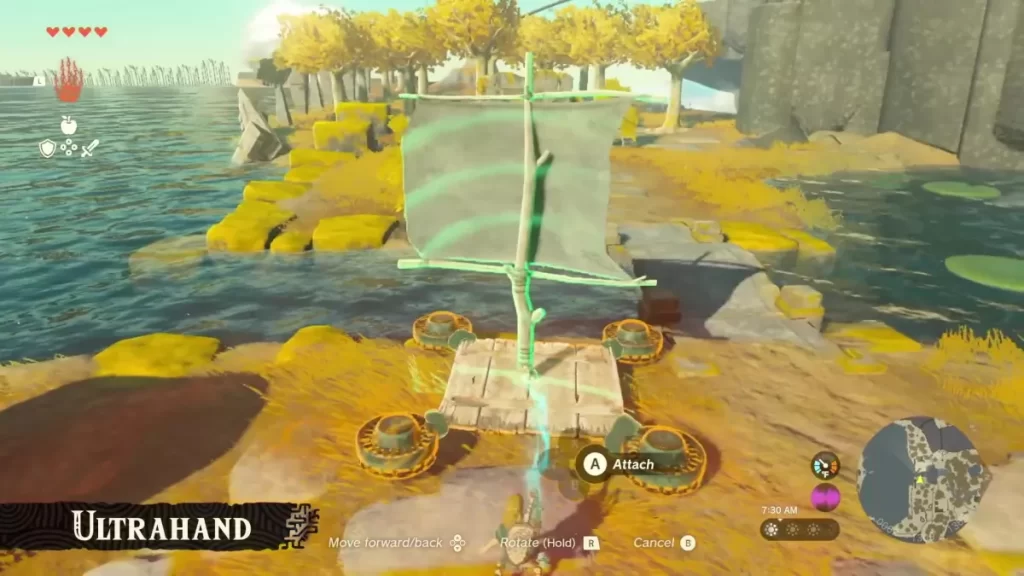
Ultrahand is a remarkable combination of telekinesis and adhesive properties. With Ultrahand, Link gains the power to move and attach objects, enabling him to construct vehicles and other structures. Lift logs, sails, and fans to build custom-made vehicles for traversing challenging terrains. Additionally, Ultrahand plays a vital role in solving Korok puzzles required for trading with Hestu. Obtain the Ultrahand ability at the Ukouh Shrine.
Ascend Ability in Zelda Tears of the Kindom:
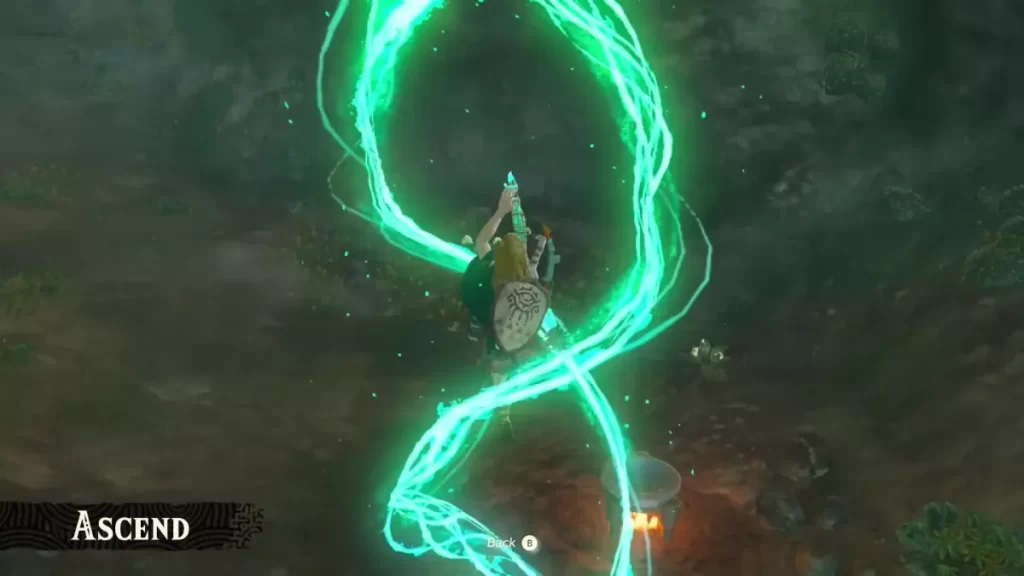
When climbing seems tedious, the Ascend ability comes to the rescue. By activating Ascend, Link can rise vertically through surfaces above him, such as ceilings or platforms. This skill allows for creative navigation and exploration. Ascend, however, has its limitations, as it requires surfaces within reach for Link to pass through. Utilize Zelda Tears of the Kingdom Skyview Towers to reach higher locations. Discover the Ascend ability at the Gutanbac Shrine.
Later Game Abilities in Zelda Tears of the Kindom:
As you progress further in the game, you’ll unlock two additional abilities:
Camera: Unleash your creativity with the Zelda Tears of the Kingdom camera. Capture breathtaking moments and document your journey in stunning detail. The camera adds a whole new layer of immersion and allows you to share your epic adventures with others.
Autobuild: With the Autobuild ability, you can construct various items, including vehicles, by combining Zonaite ore and design schematics. This feature grants you the freedom to create personalized vehicles for different purposes, enhancing your gameplay experience.
More Things To Explore In Zelda Tears of the Kingdom:
Apart from the intriguing abilities, the Zelda Tears of the Kingdom trailer offers glimpses of other noteworthy features:
Map Coordinates: The mini-map now displays three coordinates, making it easier to share exciting locations with friends for exploration and collaboration.
Glowing Towers: Mysterious towers shining from below suggest a connection to unlocking maps or potentially serving other purposes. Unravel their secrets as you progress through the game.
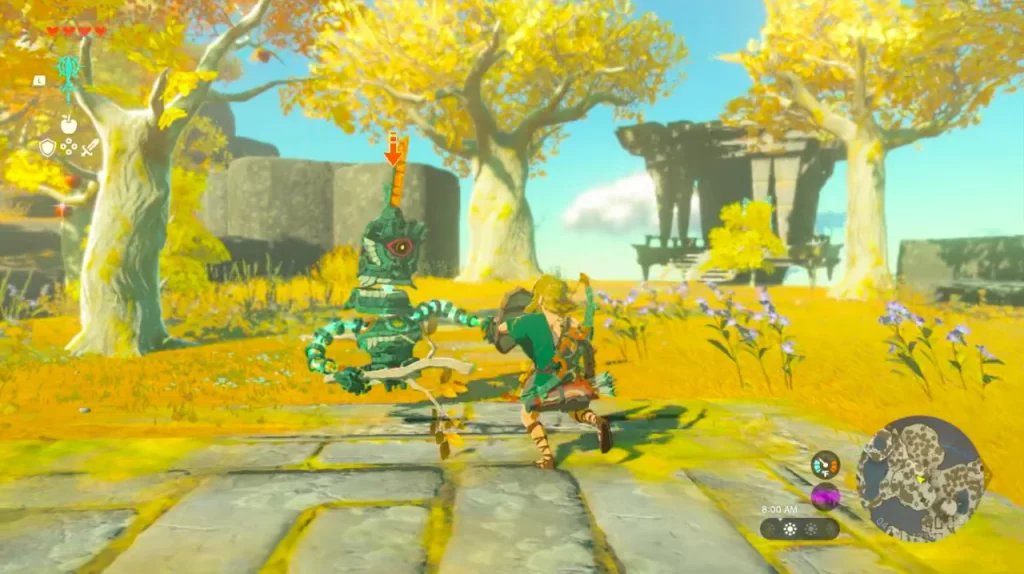
Yellow Trees and Constructs: Pay attention to the significance of yellow trees, as they may hold special resources. Additionally, be prepared to encounter Constructs, new enemies that might appear both on Sky Islands and on the ground.
Sky Islands: The introduction of Sky Islands opens up vast new areas for exploration. Brace yourself for exciting adventures and the possibility of encountering unique dungeons in these ethereal locations.
Related Posts:

Sons of the Forest is an exciting survival game that requires players to navigate through a dense forest filled with dangerous creatures and obstacles. One of the most important tools for survival in the game is a torch, which can help players to light up their path and stay safe from the dangers lurking in the dark. In this article, we will discuss how to craft a torch in Sons of the Forest, and the materials required to do so.
Materials Required:
To craft a torch in Sons of the Forest, you need the following materials:
- Stick
- Cloth
These materials can be found in the game world, so make sure to keep an eye out for them as you explore.
Crafting a Torch:
Crafting a torch in Sons of the Forest is a relatively simple process. Here are the steps you need to follow:
Step 1: Find a Stick
The first thing you need to do is find a stick. You can easily find a stick on the ground, or by breaking off a branch from a tree.
Step 2: Find Cloth
The next thing you need is cloth. You can find cloth in various locations, such as abandoned camps, caves, and villages. Look for fabric scraps or rags lying around.
Step 3: Combine Stick and Cloth
To create a torch, you need to combine the stick and the cloth. Open your inventory and select the stick and cloth. Drag the cloth over the stick to combine them. The torch will now appear in your inventory.
Step 4: Light the Torch
To use the torch, you need to light it up. To do this, approach a fire source such as a campfire or a burning tree, and interact with it to light the torch.
Crafting a torch in Sons of the Forest is a simple process that can make a big difference in your survival. With a torch, you can light up your path and stay safe from the dangers that lurk in the dark. By following the steps outlined in this article, you can easily craft a torch using the materials available in the game. So, light up your path with ease and stay safe in Sons of the Forest.
Related Posts:

Have you heard about the latest buzz in the Retro Bowl community? Players are talking about a mysterious mode called QB mode, but is it actually playable in the game?
What is QB Mode in Retro Bowl?
QB mode is a rumored mode in the popular American football game Retro Bowl. Despite being a popular topic among players, the official statement from the game creators is that they have no plans to introduce QB mode anytime soon.
How Some Players are Accessing QB Mode
While it is not an official feature of the game, some players have claimed to have access to QB mode. According to popular YouTuber, I’m Grego, he created the mode himself as a passion project to bring his love of college football to life.
The Future of QB Mode in Retro Bowl
According to I’m Grego, he had a conversation with the community manager of New Star Games, who stated that while they find the idea of QB mode intriguing, it is not likely to be introduced soon. However, there is a possibility that a standalone QB career game could be released in the future, but it is still some time away from being available for the public to play.
For more information about QB mode in Retro Bowl and I’m Grego’s thoughts on the topic, check out his YouTube video “How to Play QB Mode in Retro Bowl.“
Read More:
Hogwarts Legacy’s total area: How big it actually is?
Hogwarts Legacy: How to get Ashwinder eggs?

One Piece Treasure Cruise is a game version of the famous anime series One Piece. This tale is a gem written by Eiichiro Oda. In the game, players can get the feeling of participating in this tale themselves. Players make their ideal pirates game by picking the characters accessible throughout the story.
There are many characters available throughout the journey and every character has its own use but when picking a character for Crew player wants the best character.
To help the players in getting their perfect Nakamas we have created a tier list of every available character. Players can read this article to pick the brilliant members for their Nakama from the list given below:
One Piece Treasure Cruise: Tier List
S-Tier Characters List
The characters in S-tier with their wide range of playstyles are excellent for any Crew in the game.
- In STR Type Characters are Monkey D. Luffy, Gear 4 – Snakeman.
- In PSY and QCK Type Characters are Red Hair Pirates, Pirates Fighting for the Sake of their Friend.
- In DEX, QCK-type characters are Luffy & Law, Miracle-Making Generation.
- In the STR type, the characters are Monkey D Luffy, and The Great Snake Surpassing the Future.
- In PSY Type characters are Trafalgar Law, Alliance to Liberate the Land of Wano, Monkey D. Luffy, Overcoming the Strongest with his Friends, Gol D. Roger, Captain of the Roger Pirates.
- In DEX, STR Type characters are Vivi & Rebecca, Shared Benefactors.
- In PSY Type characters are Boa Hancock, and Vacation on the Evening Beach.
- In STR, INT Type Characters are Sabo & Koala, The Young Aces of the Revolutionary Army.
- In STR type characters are Kozuki Oden, Heir to the Shogun of Wano.
- In the STR type, the Characters are Douglas Bullet and The Monster that Lost Its Purpose.
A-Tier Characters List:
The character in the A-tier has the potential to reach S-tier if their abilities are utilized correctly.
- In STR, PSY Type Characters are Mihawk & Perona, Powerful Residents of Former Muggy Kingdom.
- In PSY, INT Type Characters are Whitebeard & Marco, The Fierce Battle at the Paramount War.
- In INT Type characters are Sakazuki, Decisive Deadly Battle.
- In QCK Type Characters are Sugar, Queen of the Toys.
- In INT Type Characters are Mihawk, Deep Night Dark Road.
- In QCK Type Characters are O-Soba Mask.
- In STR Type Characters are Kozuki Oden, Heir to the Shogun of Wano.
- In DEX Type Characters are Kaido, The Strongest Creature.
- In INT Type Characters are Blackbeard, Emperor.
- In INT Type Characters are Charlotte Katakuri, Haki that Conquers the Future.
- In INT Type Characters are Silvers Rayleigh, Right Hand of the Pirate King.
- In PSY Type Characters is Boa Hancock, Vacation on the Evening Beach.
- In PSY Type Characters are Kuzan, Decisive Deadly Battle.
- In INT Type characters are Law, Road Midnight Street.
- In PSY Type Characters are Trafalgar Law, Alliance to Liberate the Land of Wano.
- In INT Type characters are Ace, Trickster Flame Wolf.
- In DEX Type Characters are Corazon, Sympathy for Law.
B-Tier Characters List:
These characters can be used for special conditions and overall get their job done in normal situations.
- In PSY Type Characters are Charlotte Katakuri, Manly Match.
- In PSY Type Characters are Sabo, True Power of the Mera Mera no Mi.
- In INT, PSY Type Characters are Shirahoshi & Mansherry, A Wonderful Encounter.
- In PSY Type Characters are Garp the Fist, Grandfather of the Future Pirate King.
- In STR, DEX Type Characters are Luffytaro & Zorojuro, Wano Country’s Saviors.
- In DEX, QCK Type Characters are Bartolomeo & Cavendish, The Noble Prince & Cannibal Fighting Together.
- In QCK Type Characters are Carrot, A Mystical White Sulong.
- In INT Type Characters are Sakazuki Akainu, Decisive Deadly Battle.
- In QCK type Characters are Charlotte Cracker, Fear of the Infinite Biscuits.
- In DEX Type characters are Corazon, Sympathy for Law.
- In DEX, INT Type characters are Nami & Robin, Red Tulips Relaxation.
- In PSY Type Characters are Sanji & Judge, The Parting Between Father & Son.
- In QCK type Characters are Whitebeard, End of the Long Journey.
C-Tier Characters List:
These character don’t stand out on their own but provide a great assistance when paired with other character.
- In STR type characters are Lucy, Corrida Colosseum Champion.
- In QCK Type Characters are Revolutionary Army Chief of Staff Sabo, “Mera Mera no Mi: The Real Identity of Lucy.
- In INT Type characters are Katakuri, 3 Sweet Commanders.
- In QCK type characters are Oiran Komurasaki.
- In INT Type characters are Vinsmoke Judge, Germa 66 Science, Military Force.
- In PSY Type Characters are Vinsmoke Judge, Germa 66 Science Combat Force.
- In QCK Type Characters are Kuzan, Unfaithful Beliefs of Justice.
- In QCK Type characters are Strawhat Luffy, The Potential Power of the Gomu Gomu no Mi.
- In INT Type characters are “Red Hair” Shanks, Captain of the Red Hair Pirates.
- In DEX Type characters are Nami, Cat Burglar Deceiving the New World.
- In PSY Type characters are Tony Tony Chopper Heavy Point.
- In INT type characters are Charlotte Pudding, Love and Determination.
- In DEX type characters are Dark King Rayleigh, An Old Soldier Watching Over the Next Generation.
- In DEX type characters are Eustass Kid, Magnetic Captain Challenging the Dragon.
D-Tier Characters List:
These characters can be used but the composition of the crew need to be changed.
- In DEX Type characters are Magician Basil Hawkins, Follower of the Dragon.
- In DEX Type Characters are Heavenly Demon Doflamingo, Ruler of the Bird Cage.
- In INT type characters are Hawk Eyes Mihawk, The Black Blade.
- In INT Type characters are Knight of the Sea Jinbe.
- In STR type characters are Big Mom, Emperor Suffering from Hunger Pangs.
- In STR, PSY Type characters are Inuarashi & Nekomamushi, Antagonistic Kings of Day and Night.
- In QCK Type characters are White Chase Smoker, a Marine who Carries Out His Own Justice.
- In INT type characters is Roronoa Zoro, A Momentary Glimpse of a Great Swordsman.
- In STR type characters are Jack, Eleph-eleph Fruit.
- In QCK, STR Type characters are Luffy & Ace, Pirates Rising.
- In DEX type Characters are Sabo, Dragon Claw.
- In PSY type characters are Trafalgar Law, Former Warlord of the Sea.
- In QCK type characters are Franky, The Modified Man Living his Manly Dream.
F-Tier Characters List:
These characters are only useful in a certain scenario or with a specific character.
- In DEX type characters are Monkey D Luffy, To Become a True Kung Fu Master.
- In QCK Type Characters are Jinbe.
- In QCK Type Characters are Marco the Phoenix, Illusion Flame Beast.
- In INT type characters are Fujitora, Surefire Gravity.
- In DEX type characters are Dracule Mihawk, Teaching the Secret Techniques of a Great Swordsman.
- In STR type characters are Fleet Admiral Sakazuki, Enforcer of Absolute Justice.
- In INT Type Characters are Nico Robin, Umbrella Blocking Iron Stars.
- In PSY Type characters are Vinsmoke Sanji, Germa Kingdom’s Sacrifice.
- In QCK type characters are O-nami, Novice Kunoichi.
- In STR type characters are Arlong, Sun Pirates.
Frequently Asked Questions
1. Is ONE PIECE TREASURE CRUISE popular?
One Piece Treasure Cruise is a gacha game based on Eiichiro Oda’s manga. It has been developed by Bandai Namco and is available for both iOS and Android platforms. It has over 10 million+ downloads on the Google Play Store, which makes it a rather famous mobile game.
2. Who is the best character in ONE PIECE TREASURE CRUISE?
S Tier List (2022) characters are the best characters in the One-piece Treasure Cruise game.
3. Is one-piece treasure Cruise a Gacha game?
It was released for Android and iOS platforms. As of May 2023 the game has exceeded 100 million downloads worldwide. It features gacha game mechanics.
Also Read:
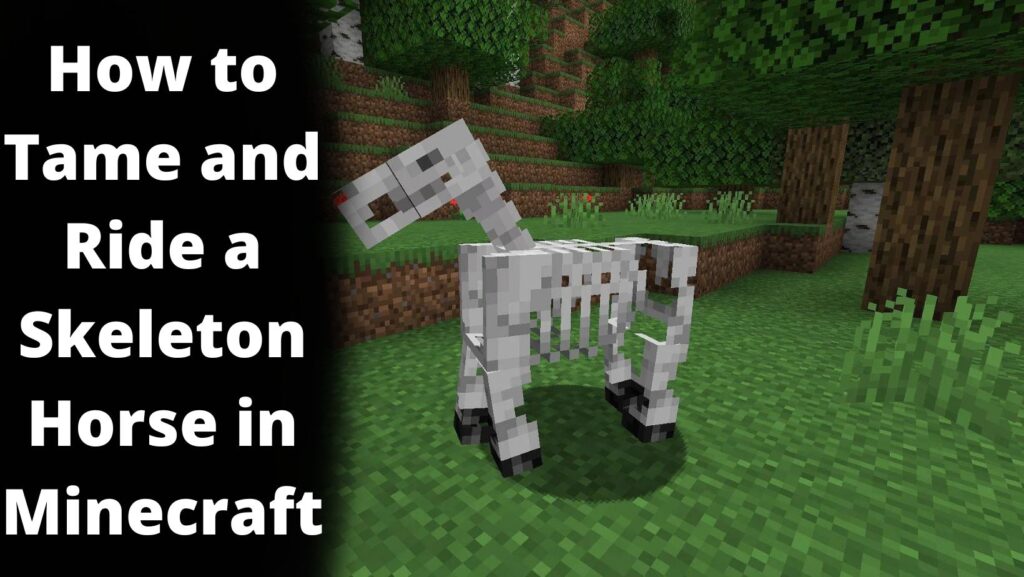
Skeleton Horses are easy to find in Minecraft but to tame and ride them is not as simple as it looks. To tame and ride a Skeleton Horse in Minecraft, you can utilize the saddle by putting it on the horse. Saddle helps to control and move the Skeleton Horse in Minecraft.
However, you can follow this Minecraft Guide describing How to Tame and Ride a Skeleton Horse in Minecraft.
Required things to Ride the Skeleton Horse:
The following two are the main resources to ride a skeleton horse in Minecraft:
- A Saddle
- A Skeleton Horse
Guide to Tame and Ride a Skeleton Horse in Minecraft
You can follow these steps to tame and ride the Skeleton Horse using the saddle:
1. Find a Skeleton Horse
To tame a Skeleton Horse in Minecraft, You have to find one in the gamer first. Skeleton Horses appear in Minecraft when lightning struck on a normal Horse. However, if you are not getting in touch with a skeleton horse you can always use a skeleton horse spawn egg or you can summon one by using tricks.
2. Tame the Skeleton Horse in Minecraft
After finding a Skeleton Horse, pick an empty slot in your Hotbar first (because you must use your hand to tame the skeleton horse). You may tame a skeleton horse by continuously attempting to mount it and failing because of the animal’s bucking.
The game control for taming the skeleton horse varies depending on the Minecraft version:
- Press the LT button on the Xbox controller for the Xbox 360 and Xbox One.
- Press the PS controller’s L2 button for the PS3 and PS4.
- Press the ZL button on the controller for Wii U.
- Press the ZL button on the controller for Nintendo Switch.
Every time you attempt to sit down on the skeleton horse, it will kick you off. To get it to settle down and allow you to sit on it, you must keep trying. When hearts are floating around the horse, you know it has been tamed.
At this stage, the skeletal horse is available for riding, but until a saddle is attached, you are unable to control the animal’s movement. So let’s attempt mounting the skeleton horse with a saddle.
3. Place a saddle on the skeleton horse
Select the saddle on your Hotbar to mount a saddle on a skeleton horse. Depending on the version of Minecraft, the player can use the following controls to saddle the skeleton horse:
- To mount the skeleton horse on Xbox 360 and Xbox One, hit the LT button on the controller, and then click the Y button to access your inventory.
- To mount the skeleton horse on PS3 and PS4, hit the L2 button on the PS controller. To access your inventory, press the P3 button Triangle button.
- To mount the skeleton horse on the Wii U, hit the ZL button on the gamepad. Then, press the X button to access your inventory.
- To mount the skeleton horse on the Nintendo Switch, click the ZL button on the controller, and then press X to access your inventory.
Your skeleton horse should appear in a window that shows the gear it is wearing.
Place the saddle in the saddle box on the left side of the drawing of the skeleton horse by moving it from the Hotbar.
You can observe how your skeleton horse’s look changes when the saddle is worn after you place the saddle in the saddle box.
Returning to the game now should reveal the saddle-wearing skeleton horse. Let’s start by learning to ride the skeleton horse.
4. Ride the Skeleton Horse
To mount and ride the skeleton horse, you can use the same controls that you used to walk as yourself in Minecraft. The version of Minecraft you are using will determine how you control the skeleton horse:
- Right-click the skeleton horse in Java Edition (PC/Mac).
- You position your pointer over the skeletal horse in the Pocket Edition (PE) and click the Ride button.
- Press the LT button on the Xbox controller for the Xbox 360 and Xbox One.
- Press the L2 button on the PS controller for the PS3 and PS4.
- Press the ZL button on the controller for Wii U.
- Press the ZL button on the controller to control it on the Nintendo Switch.
- Right-click the skeleton horse to access it in the Windows 10 Edition.
- Right-click the skeleton horse to ride it in the Education Edition.
5. Dismount from the Skeleton Horse
The version of Minecraft you are using will determine how you dismount the skeleton horse:
- Press the left shift key for Java Edition (PC/Mac).
- Press the Center button (also known as the crouch or sneak button) twice on the Pocket Edition (PE).
- Press the Right Stick (RS) on the Xbox controller for Xbox 360 and Xbox One.
- Press the Right Stick (RS) on the PS controller for the PS3 and PS4.
- Press the Right Stick (RS) on the controller for Wii U.
- Press the Right Stick (RS) on the controller for the Nintendo Switch.
- Press the left shift key while using Windows 10 Edition.
- Press the left shift key for the Education Edition.
Also Read:
How to Make and Use a Conduit in Minecraft?
Minecraft Guide: How to Make Netherite Armor in Minecraft?
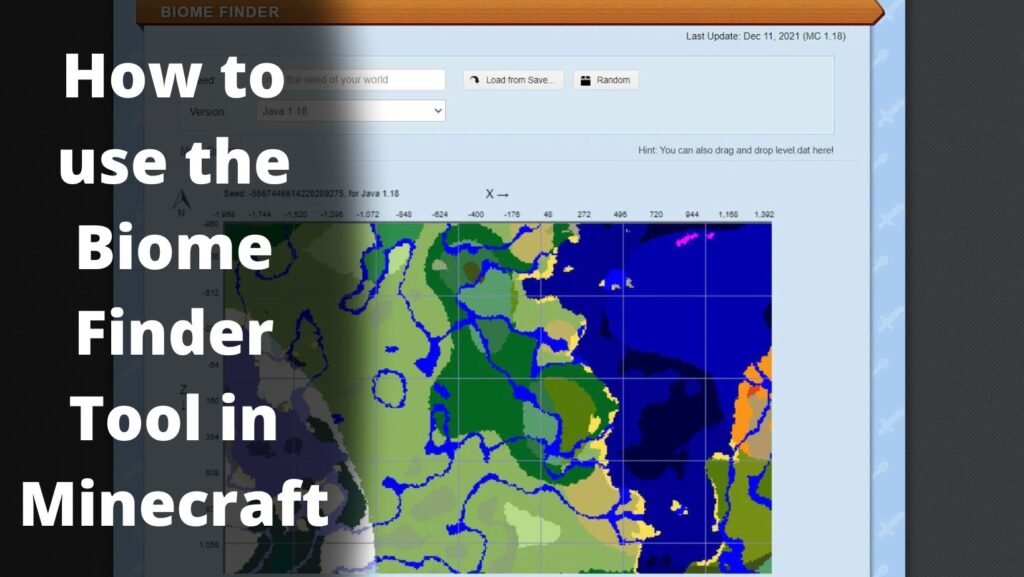
The unique Minecraft Biome Finder tool simplifies the process of locating constructions or biomes in the game. There are numerous locations in Minecraft with various terrains, vegetation, and building blocks that you can create or simply find using the Biome Finder. Deep oceans, deserts, and farmlands are examples of such areas. They are influenced by a number of environmental factors. These regions are known as Biomes in Minecraft.
Minecraft’s developers have included a wide variety of structures and features since the game’s release in 2011, allowing users to construct objects using their creative architectural imagination. Furthermore, players help one another in a variety of ways while playing this sandbox game. There are numerous websites that can help users find pre-built structures or biomes to use in Minecraft. Biome Finder is one of the websites where you can find precise biomes for Minecraft. This article will teach you how to use the Biome Finder in Minecraft.
How to use the Biome Finder website for Minecraft?
Biome Finder Tool or Website
Biome Finder Tool is not an in-built feature in Minecraft. Biome Finder tools are basically websites that can be used to create different regions and structures in Minecraft from outside. There are many websites like this on the internet. However, the best website for Biome Finder is here.
What is Seed of the World in Minecraft?
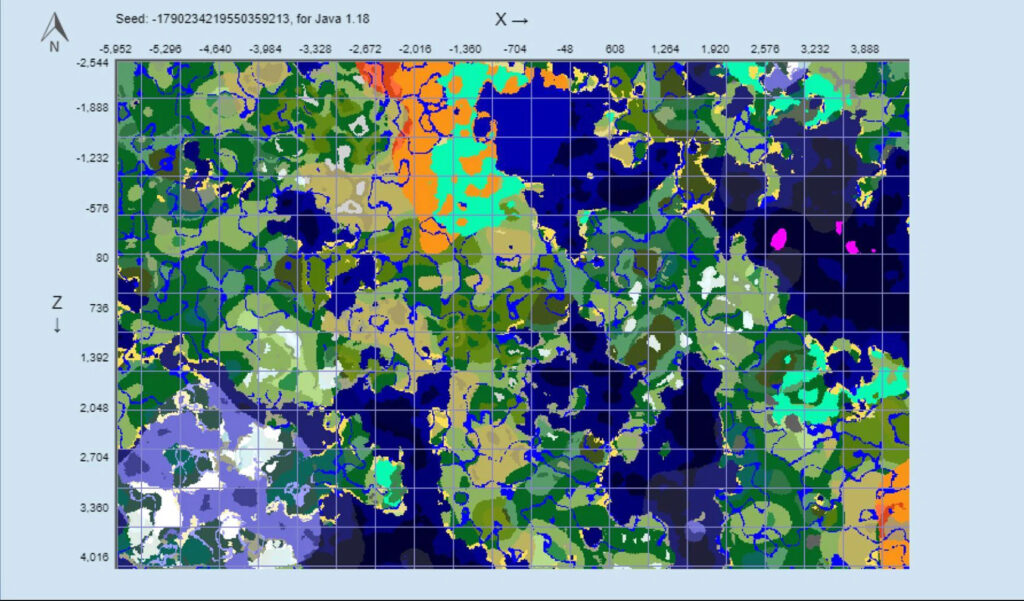
Seed is basically a Unique ID of the world or server on which players are currently playing Minecraft. These unique characters define the worlds and their uniqueness from each other. Players can find the seed of the world in Java Edition by simply typing the “/seed” command in the chat. In the Bedrock Edition of Minecraft players can look into the settings of their current world for the seed.
Steps to Use Biome Finder in Minecraft
You can follow these steps to use the Biome Finder for Minecraft:
Step 1: First of all, open the above-mentioned Biome Finder website.
Step 2: On the Interface of the site, Players can enter the “Seed” of the world in the given box there.
Step 3: After typing the seed in the box, click on the “Enter” button to proceed.
Step 4: Wait for the world map to be updated and after that players can see all the biomes in the world.
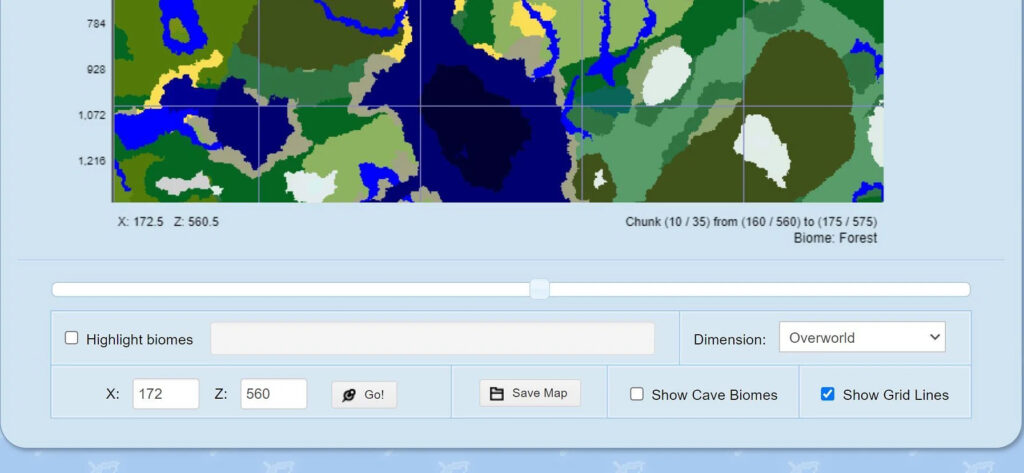
The Minecraft biomes are now simple for players to use. Additionally, players can highlight a certain biome using Biome Finder’s various settings, and in newer versions, they can even view cave biomes.
Also Read:
Minecraft Guide: How to Make Smooth Stone?
How to Redeem Genshin Impact Codes 2022?
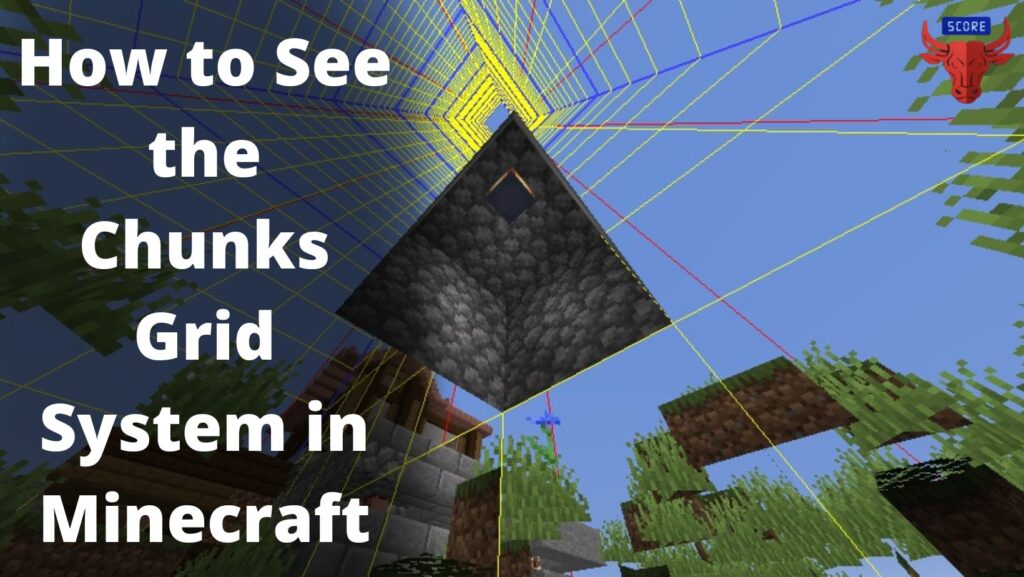
Minecraft’s chunks grid system is an amazing feature in this popular Sandbox game. Minecraft is a building game in which players use their imagination to optimize 2D pixels to create beautiful things in the 3D game. Moreover, players also can create things like SMPs, Gigantic Builds, RPG Realms, Redstone Machines, etc. The Chunks Grid System helps users to identify the locations to build these structures. Generally, Chunks are 16×16 size boxes, that are combined to make a grid system or border of the Minecraft world.
In this post, we will talk about how to see the chunks grid system in Minecraft and a complete guide to the same.
What are Chunks? Guide to See Chunks Grid System in Minecraft
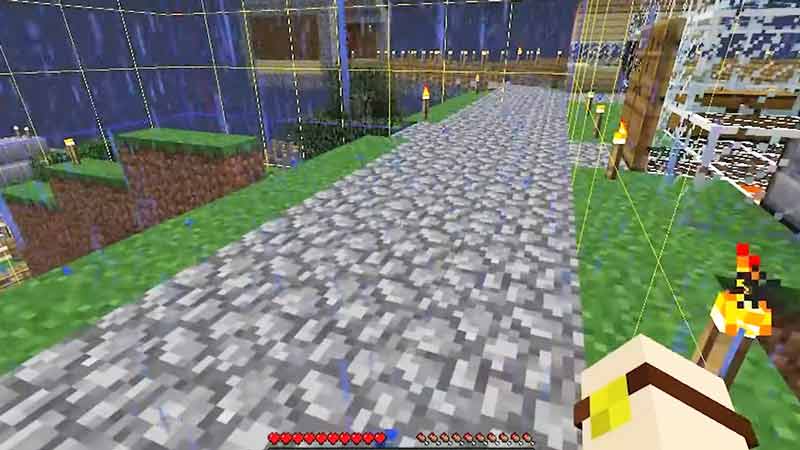
Chunks in Minecraft are an aspect for players to see how the world is rendered for each of them. Chunks play an important role to reduce the lag in Minecraft caused by various commodities. These partitions of the Minecraft world are mostly used to build structures but mainly these work for the Redstone Machinery. The rendering optimization between two chunks can break down the two Redstone Machinery built in them. Therefore, players must build this in one chunk to resist errors or lagging.
To make this possible in Minecraft, players need to see a chunk grid system. Hence, here are the steps to see chunks in Minecraft:
Steps to See Chunks in Minecraft
Step 1: Players need to access F3 Menu to see the chunks grid system in Minecraft.
Step 2: Don’t hurry to press the F3 button yet. Players can try to press F3 + G. This will allow them to open the F3 menu and also will reveal the Chunks Grid System in Minecraft.
Step 3: Players can now see the Chunks and also can build their creations within the border of the chunks.
The Chunks Grid System will also help gamers to measure the area around their location in the game. Therefore, Keep reading our posts for such guides and now you can create your world in Minecraft.
FAQs about Minecraft
1. How do you show chunk grids in Minecraft?
Ans. The Key F3 + G can help to watch the chunk grids or boundaries in Minecraft.
2. How do you know what chunk you are in Minecraft?
Ans. Players can find out what chunk they are in on Minecraft Java edition by pressing the F3 key on their keyboard. Also, a debug screen will open up containing X, Y, and Z coordinates with other information.
3. What are all the F3 commands in Minecraft?
Ans.
| Command | Description |
|---|---|
| F3 +A | Reloads all the chunks |
| F3 +B | Toggles visibility of the hitboxes available on entities, and also shows the direction in which the entity is facing. |
| F3 +C | Copies the player’s current location and rotation in the form of /tp command.If held, after ten seconds, it would force a debug crash. |
| F3 +D | Clears the chat history, including past messages sent within its period. Action cannot be undone. |
| F3 +F F3 +? Shift +F | Changes the render distance. |
| F3 +G | Toggles chunk borders |
| F3 +H | Toggles advanced tooltips |
| F3 +I | Copies the block or entity data to the clipboard |
| F3 +N | Creative <—> Spectator Cycle |
| F3 +P | Toggles automatic pause if the lost focus |
| F3 +Q | Gives help/shows all the F3 commands |
| F3 +T | Reloads all textures, models, and sounds within a pack |
| F3 +? Shift | Toggles profile graph with debug screen |
| F3 +? Alt | Toggles Frame Time Graph with Debug Screen |
| F3 +F4 | Toggles the game mode switcher |
Also Read: Minecraft: How to Tame Frogs in Minecraft 1.19 update?

The most well-known anime of all time is Dragon Ball. So it comes as no surprise to play an anime-based video game in this series. Currently, Dragon Ball Legends is the most well-known anime-themed video game. Bandai Namco and Dimps created the action RPG game.
For users to receive different in-game stuff for free, the developers also implemented a redemption feature. Each month, Dragon Ball Legends released new redeem codes that let users claim a variety of free gifts. In addition to the redemption codes, the game often releases a number of events from which players can also receive rewards using the codes that the events contain.
This article contains a step-by-step guide to getting various rewards using the Dragon Ball Legends Redeem Codes. Players should use the active redeem codes in this guide to get their hands on different in-game exclusive items to progress in the game quickly.
Dragon Ball Legends Redeem Codes for various rewards
Dragon Ball Legends is the ideal illustration of a video game with amazing 3D graphics and characters that transport players back to their youth. Players can engage in PvP combat in Dragon Ball Legends. Players can engage in real-time battles with Dragon Ball fans from all over the world, as well as reveal their identities.
[Notice]
— DRAGON BALL LEGENDS (@DB_Legends) May 9, 2023
The Dragon Ball Legends 5th Anniversary Campaign will kick off on May 27, 2023!
And wait, there's more!
A special broadcast loaded with campaign info is planned for 2:00am on May 27 (UTC)!#DBL5thAnniversary#DBLegends#Dragonball pic.twitter.com/6PqPdfTPog
The developers of Dragon Ball Legends allow players to get in-game premium items for free which will help them to advance in the game rapidly. Players can get these items via redeem codes, that are introduced monthly on various Social Media and through special in-game occasions. These free redeem codes can be used to get various in-game rewards and magical resources such as gems, coins, hero shards, summon orbs, senzu beans, and more.
Active Dragon Ball Legends Codes – May 2023
The active or working redeem codes in Dragon Ball Legends can only be used once to obtain free rewards. A redemption code can not be used twice. The following is the list of active Dragon Ball Legends Redeem Codes:
longzhu888: Get Free Gems
longzhu666: Get Free Gems
longzhu188: Get Free Gems
Freepull30: Get 200 Gems and 2 advanced summon orbs
qhebjHH: Get 500 Gems for free
X6AyEGBv: Get 300 Gems for free
wayline7yz: Get 300 Gems for free
waylinexxk: Get 300 Gems for free
wayline628: Get 300 Gems for free
b6AyELBt: Get 500 Gems for free
OneIsAll: Get free exclusive reward
w3cBk2QJ: Get S rank Piccolo
i4PNW4nV: Get 100 Gems and 500K Coins
B5kMAvGk: Get 400 gems
L5kJ69m: Get 20 SS Hero Shards
Resource999: Get 199 Gems and 9999 Coins
R5kKCeDw: Get 200 gems and 2 Senzu Beans
b4PMjyud: Get 200 gems
The redeem codes must be used before the end of the month or their expiry date.
How to redeem codes in Dragon Ball Legends?
Here are the steps to redeem codes in Dragon Ball Legends:
Step 1: In the top left corner of the screen, after the game has begun, tap the player avatar symbol. In-game information such as total damage, tier, code redemption box, and more can also be found there.
Step 2: Search for the “Redeem” option on a new tab. The players are suggested to use only valid codes to enter the vacant field. The usage of expired codes is prohibited.
Step 3: In the box, enter any active redeem code. When a player enters the code, the prize that is associated with it is displayed.
Step 4: To obtain prizes, enter each code one at a time into the text box before selecting the exchange option. The new awards can then be used to purchase different in-game items via the game’s resource section.
Also Read:
